
Jira
Freely Manage Jira with SaaSConsole
SaaSConsole lets you manage your Jira groups and projects all within one platform. Automate creating your users, update your groups and much more-no code required.
Connect to SaasConsole
Connect your Jira Account to SaasConsole
Requirements:
- Jira Account with Site Admin Role.
Steps:
- Login to SaaSConsole
- Navigate to the Integration section.
- Find Jira integration at https://app.saasconsole.com/integrations.
- Click on the Connect button.

- Select Configure
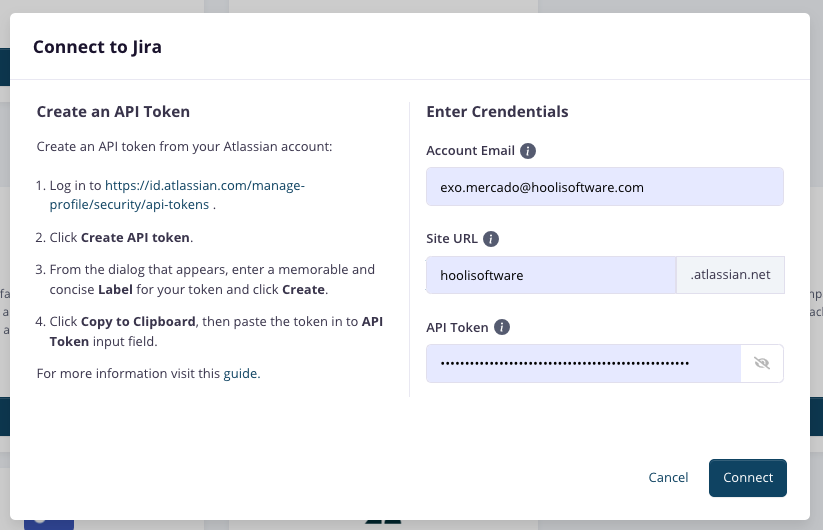
- Enter your credentials. If you don’t have an API Token, follow the steps on the left side of the form to create one.
- Click Connect.
Manage Groups within SaaSConsole
Connect Jira Groups to SaaSConsole Group
Requirements:
- User must have a Jira Account with Site Admin Role.
Steps:
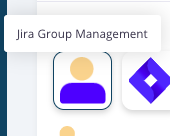
- Under Jira Integration, click on Jira Group Management. This feature allows you to manage group within SaaSConsole.
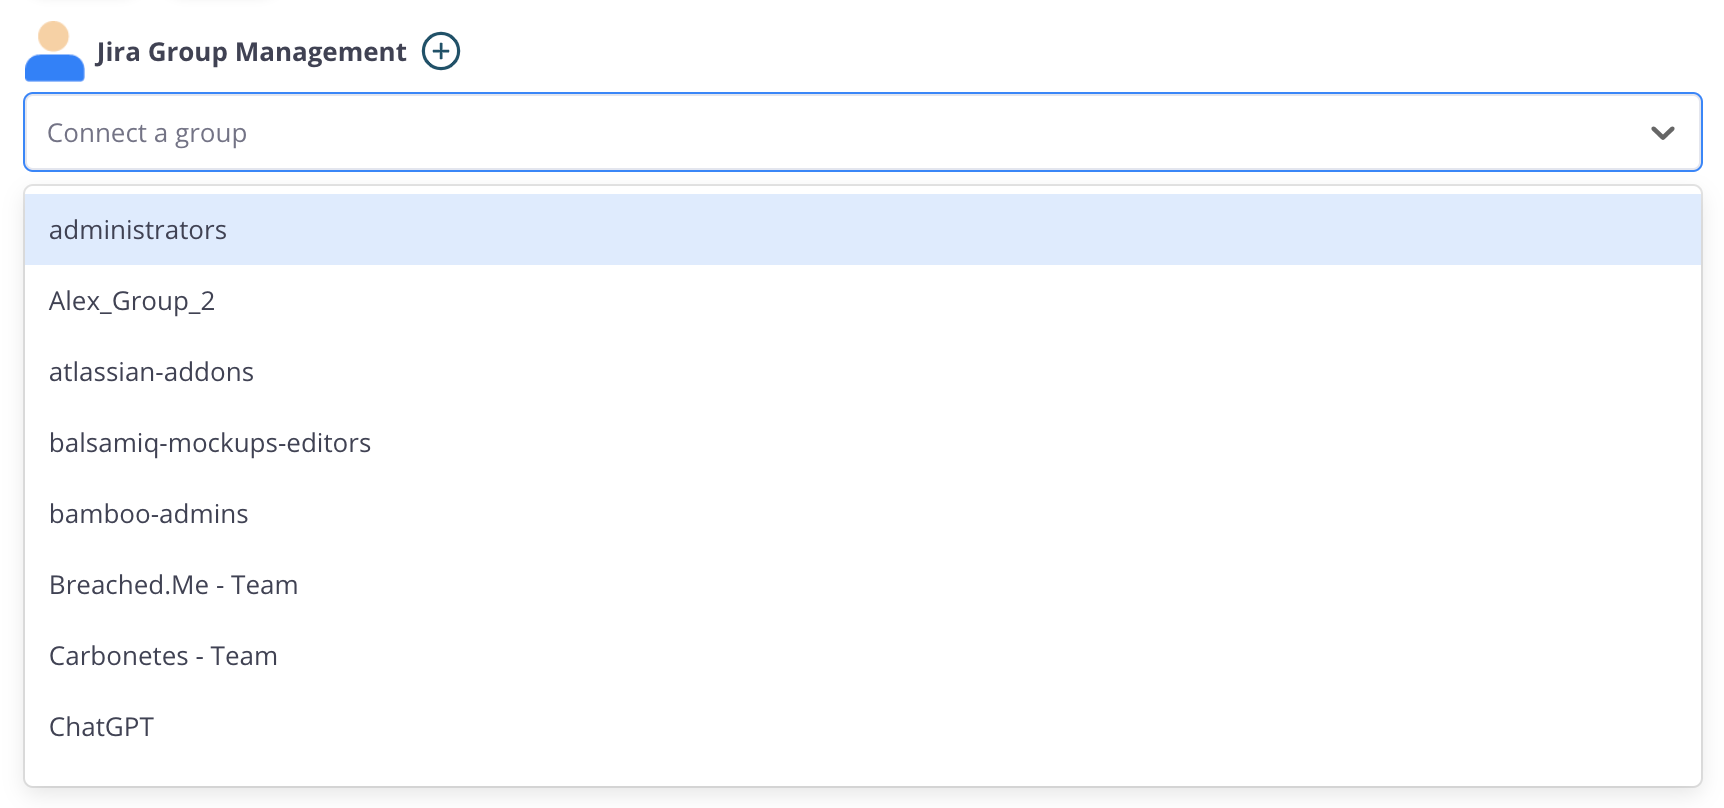
- Click on the dropdown option to view all the available group.
- Select a group you want to connect to your SaaSConsole group and its participants. This action takes the members of your SaaSConsole group and adds them as members to your selected group.
Create Jira Group through the SaaSConsole Group
Requirements:
- User must have a Jira Account with Site Admin Role.
Steps:
- Under Jira Integration, click on Jira Group Management. This feature allows you to manage groups within SaaSConsole.

- Click on the add icon to create a Jira Group. This will open up the Create Group Modal.
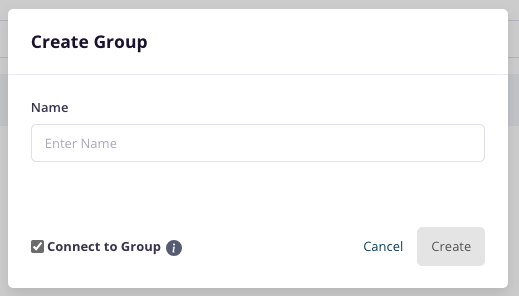
- To create a group, users are required to provide a group name./ Users are also provided an option to provide a group description and automatically connect the created jira group to the SaaSConsole group by simply checking the option on the create modal.
- Once satisfied with the Group information, click the Create button. This action will create a new group in your Jira account.
Disconnect Jira Group through the SaaSConsole Group
Requirements:
- Connected Jira Group.
Steps:
- Under Jira Integration, click Jira Group Management, this feature allows you to manage group within SaaSConsole.
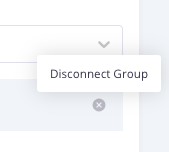
- To delete a Jira group, navigate to the action column on the connected Jira Group name. Click on the trash icon to disconnect the group. This will open up the Disconnection Confirm modal.
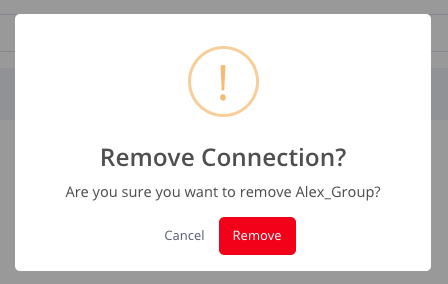
- Once you are sure to disconnect the group, click the remove button. This action will remove the connection of your Jira group to the SaaSConsole group and its members.
Manage Projects within SaaSConsole
Connect projects to SaaSConsole Group
Requirements:
- Users must have a Jira Account with Site Admin Role.
- Connected Jira Group.
Steps:
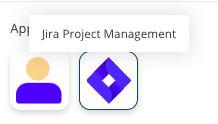
- Under integration for Jira Integration, click Jira Project Management, this feature allows you to manage projects within SaaSConsole.
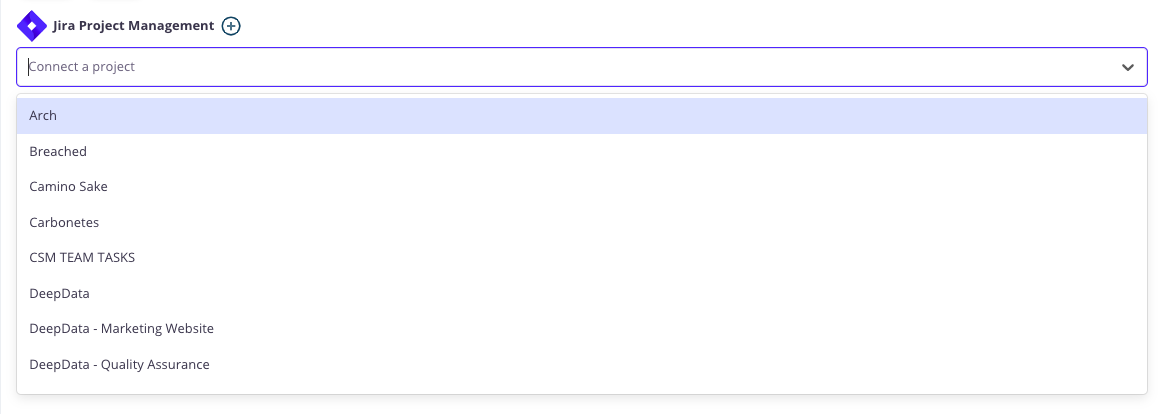
- Click on the dropdown option to view all the available projects.
- Select a project you want to connect to your SaaSConsole group. This action takes the connected Jira group as role actors of the selected project. The connected Jira groups will have the lowest available role assigned to them once the jira project connection is successful.
Create Jira Project through the SaaSConsole Group
Requirements:
- Users must have a Jira Account with Site Admin Role.
- Connected Jira Group.
Steps:
- Under Jira Integration, click Jira Project Management, this feature allows you to manage projects within SaaSConsole.

- Click on the add icon to create a new Jira project. This will open up the Create Jira Project Modal.
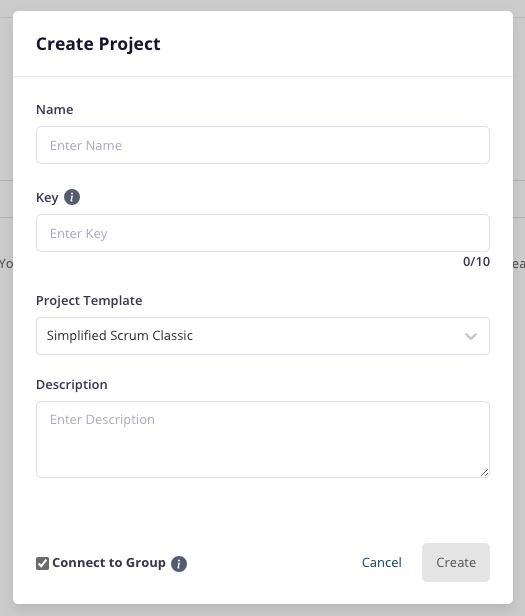
- To create a project, users are required to provide a project name and a project key. Users are also provided an option to change the project template and add a description. They also have a choice to automatically connect the created jira project to the SaaSConsole group by simply checking the Connect to this group option on the create modal.
- Once satisfied with the Project details, click the Create button. This action will create a new project for your Jira Account.
Edit Jira Project through the SaaSConsole Group
Requirements:
- Users must have a Jira Account with Site Admin Role.
- Connected Jira Group.
Steps:
- Under Jira Integration, click Jira Project Management, this feature allows you to manage projects within SaaSConsole.
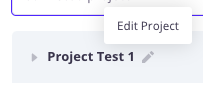
- To edit a Jira group, hover your mouse on the connected Jira project name, and a pencil icon will appear. Click on the icon to edit the group. This will open up the Update Jira Project Modal.
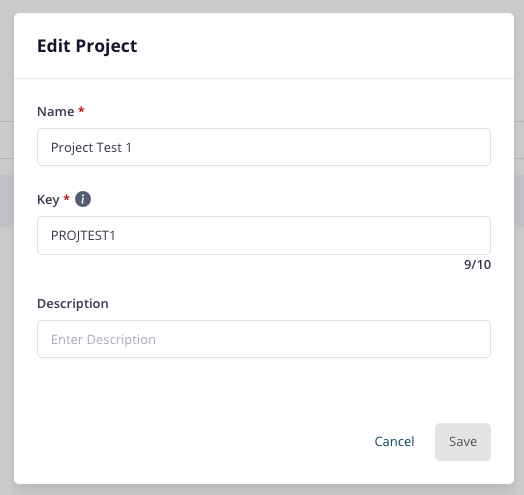
- To edit a project, users are allowed to update the Name and Description of the Jira project.
- Once satisfied with the Project Name and Description, click the Update button. This action will update the project on your Jira Account.
Disconnect Jira Project through the SaaSConsole Group
Requirements:
- Connected Jira Group.
Steps:
- Under Jira Integration, click Jira Project Management, this feature allows you to manage projects within SaaSConsole.
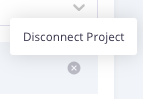
- To disconnect a Jira project, hover your mouse on the connected Jira project name, and a trash icon will appear. Click on the icon to disconnect the group. This will open up the Disconnect Jira Project Modal.
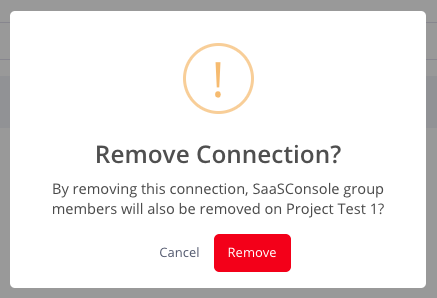
- Once you are sure to disconnect the project, click the remove button. This action will remove the connection of your connected Jira group to the Jira project. The connected groups will also lose their respective roles on the disconnected project..
Manage Role within SaaSConsole
View Jira Roles in SaaSConsole Project
Requirements:
- Connected Jira Project.
Steps:
- Under Jira Integration, click Jira Project Management, this feature allows you to manage project roles within SaaSConsole.

- Click the accordion of the connected Jira project. This will show all the connected Jira groups and their respective roles on the connected Jira project.
Assigning/Removing a Jira Role through the SaaSConsole Project
Requirements:
- Connected Jira Project.
Steps:
- Under Jira Integration, click Jira Project Management and then click a project accordion on the connected project list, this feature allows you to manage project roles within SaaSConsole.

- Click on the edit icon of the connected group you want to assign a role on, This will open up a Edit Role Modal.
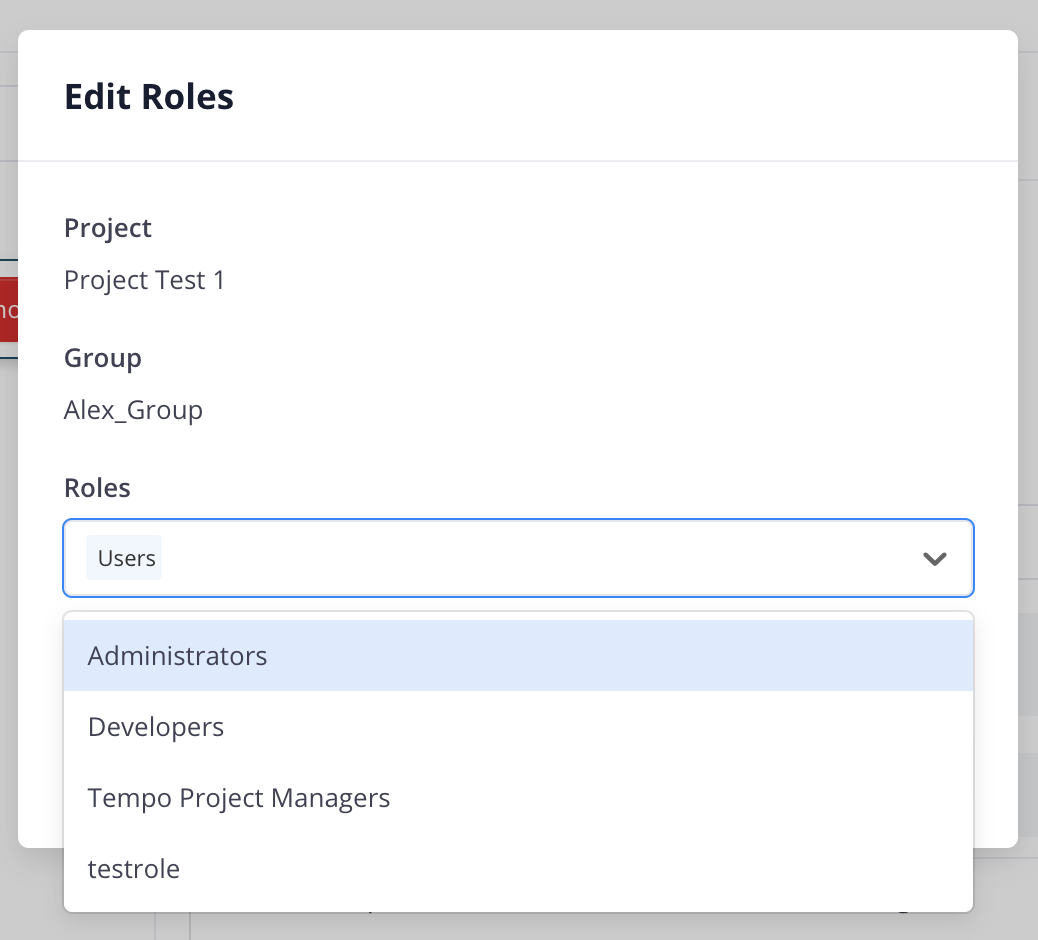
- To assign/remove a role, users can select multiple roles on the dropdown labeled “Roles”. This will allow you to add or delete roles but you cannot remove a role in this dropdown if there is only one role assigned.
- Once satisfied with the Role assignment, click the Confirm button. This action will update the connected group role in your chosen connected Jira project in your Jira account.
Creating a Jira Role through the SaaSConsole Project
Requirements:
- Connected Jira Project.
Steps:
- Under Jira Integration, click Jira Project Management and then click a project accordion on the connected project list, this feature allows you to manage project roles within SaaSConsole.
- Click on the edit icon of the connected group you want to assign a role on, This will open up a Edit Role Modal.
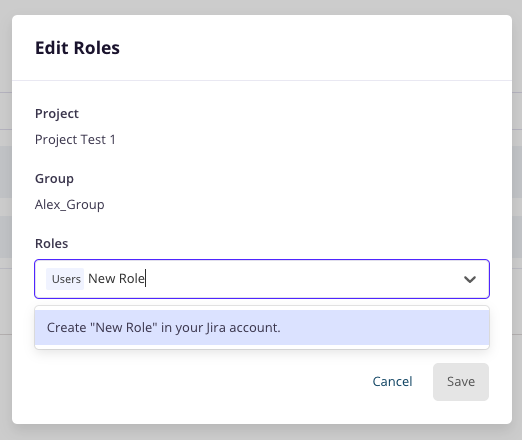
- To create a role, users can type a role name inside the select button. If the role is non-existent on your Jira account, the dropdown will show you a new option to create a new role with the name you input.
- Once satisfied with the Role name, click the Create role on the dropdown and then click Confirm button. This action will update the connected group role in your chosen connected Jira project in your Jira account.
Disconnect from SaaSConsole
Disconnect your Jira Integration
Requirements:
- Jira Integration Connection.
Steps:
- Login to SaaSConsole.
- Go to the Integration section.
- Locate the connected integration.
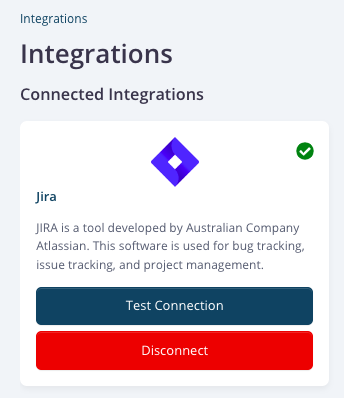
- Click on the Disconnect button.
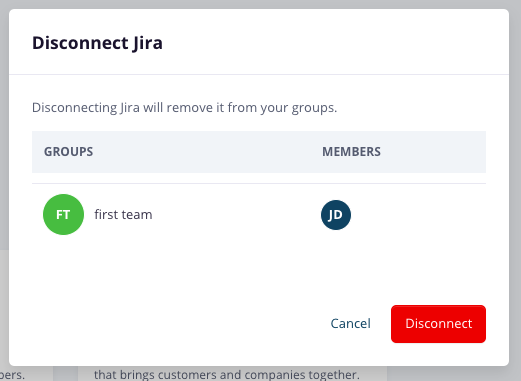
- A modal will appear showing the connected groups, if any.
- Confirm the disconnection by clicking the Disconnect button.